• Home
  • Blog
  • Contact
  • Health & Fitness

Marissa Elman | Fashion & Photography

Marissa Elman is a lifelong lover of fashion and photography.

Introduction to Contrast in Photography

July 7, 2020 by Marissa Elman

The use of contrast in photography is one of the most critical aspects of art. Knowing how to manipulate contrast will help improve your technique and photography overall. 

Contrast, simply put, means different. In photography, some of the most usual differences are changed by actually altering the changes in color or tone in the composition. Lowering or heightening the contrast in the photo can significantly alter the story your picture is telling. 

Creating an exciting color scheme involves some knowledge of color. You don’t need to have the eye for the color of Vincent Van Gogh; knowledge of or an on hand color wheel will suffice. A color wheel is a tool involved in a vast medium of art. It merely consists of the relationship between different colors. Using color schemes, you can play around with what colors provide. It’s easy to find complementary colors because they are located on the opposite side of the wheel.

An easy example is the juxtaposition of the colors green and red. They both compliment each other and cause their counterpart to pop or “stick out.” You can also classify colors into two categories, warm or cold. Combining a cold color with a warm color will provide contrast in your photo. 

The most popular form of contrast is called tonal contrast. Tonal contrast refers to the balance of brightness in different elements of an image. Those contrasting hues are very noticeable in black and white imagery. If the photo is both very dark and contains very bright tones, it has a high tonal contrast. If the image has a far range of tones from pure white to pure black, it is classified as a medium tonal interest. 

As you work on your photography and image editing sills, pay attention to your usage of contrast in both pre and post. Variation can change your story as much the actual image does. Play around with colors, tone, and brightness and, most importantly, have fun!
Buying a 35MM Camera

May 27, 2020 by Marissa Elman

The 35MM camera is the definition of vintage and class. When you think of a classic late 20th-century camera, the odds are it is the classic 35MM. 


If you’re looking for an affordable camera, check out secondhand sites like eBay or Craigslist for your camera needs. Some of the top brands are Canon, Minolta, Nikon, Olympus, or Pentax. They are all basic, top quality, and hardworking. Websites like Amazon have 35 mm film cases that can be bought affordably. Try to also look for a camera without the program mode in the hardware. The program mode can often make things too complicated for a beginner.


If you would like to get your hands on the camera before buying it, check out vintage stores. Many vintage stores have a 35MM camera in either working order, or simply for decoration and artistry. If you end up liking the camera, you can either buy it at the store or order the same make, model, and brand online or at another store. If you plan to buy the camera at a vintage store, make sure you run through all the shutter settings to make sure they aren’t sticking or damaged. 


It is also worth researching if replacement batteries are still available for the model you buy. Some batteries that are made with mercury are discontinued, or too expensive to buy. It doesn’t hurt to buy a camera from a store with a return policy or a warranty, just in case a cheaper 35mm comes with any challenges or damage. If you have money to spare, we recommend the Leica M series.


The 35MM camera is a beautiful and historical piece to use when taking pictures. Keep an eye out for our following blogs on the history and usage of the 35MM camera.


Top Photography Programs

May 13, 2019 by Marissa Elman

There are many exceptional photography programs to research when applying to a school. To give a potential student a starting point for program consideration, four websites were evaluated for their top picks. The following programs are rated on the consulted sites.


California Institute of the Arts (CalArts) in Santa Clarita is a private school. The goal of this program is to produce graduates who become artists working in analog and digital photography or video. Social commentary is supported as is involvement in grassroots organizations. Aside from artists, the career paths of graduates have included documentarians, educators, editorial and commercial photographers, journalists, curators, designers, and photographic entrepreneurs.


The University of California in Los Angeles is a program that is geared towards using photography to create art. A student’s ability to discuss the history of photography and its narrative potential is stressed while video and installation art are also explored. UCLA is a public university that was ranked first in this category by U.S. News & World Report in 2018.


Rhode Island School of Design is an art and design college located in Providence that has been consistently ranked as one of the top schools for art and design in the world. Its approach is to teach how symbols, metaphors, and cultural cues can be incorporated into image making. Creating photography is combined with learning how to interpret photographic images, thereby treating the venue as a craft and a language.


The Art Institute of Chicago‘s photography program teaches students to redefine photographic concepts. Technical and conceptual mastery are considered integral to a student’s ability to discuss their work and the work of other photographers. This independent school is located in downtown Chicago and has been rated as the most influential art school by Columbia University’s National Arts Journalism survey.


The University of New Mexico was found on all referenced websites, demonstrating its relevance and prominence. This program seeks to cultivate a student’s intellectual and aesthetic growth through visual literacy. Lens-based techniques are incorporated into a student’s acquired skill set. The school is a public university located in Albuquerque.


There are several variables to consider when choosing a photography program. Whether the school is private or public, its geographic location, and what type of career a student wants to pursue post graduation are important factors to evaluate. The programs listed in this article are all held in high regard; finding the right fit for a student’s desired qualities in a school just needs to be determined.

Common Long Exposure Photography Mistakes To Avoid

November 9, 2018 by Marissa Elman

Over the last few years, long exposures have become a popular form of photography, and with the right tools along with a proper understanding of the techniques, you can create incredibly surreal and dreamlike portrait and landscape images. These images take time and preparation to capture, and the last thing you want is for something to go wrong that you could have easily avoided. So, with that said, here are some of the most common long exposure photography mistakes and how you can avoid them.


Not Properly Locking Down Tripod Legs

One of the simplest things that often gets overlooked is your tripod or mounting system. When shooting on tripods, typically, we do not think about how stable the legs are or whether we have locked everything tightly down. When it comes to long exposure photography shooting images for several seconds to minutes long, someone simply walking by can be enough to shift the tripod and ruin your image. Make sure you are using a sturdy tripod and ensure that every point of adjustment is locked down as tight as possible to avoid image shake. Some tripods might even come with hooks are a mounting system on their center column which would allow you to attach a sandbag and add some weight and stability to your system.


Leaving The Viewfinder Open

When dealing with photographs that take 30+ seconds, your viewfinder can be one of the easiest things to forget. Leaving the viewfinder open can lead to light leaks and often leave strange colored blobs in your shot. Make sure to cover your viewfinder to avoid the light leaking in from there. Some cameras will have a switch built in to close it up, but if not, place some black gaff tape or any other handy materials over the camera back.


Not Using Mirror Lock

When you are using a DSLR and looking through a viewfinder, what you are doing is looking into a mirror which is looking into another mirror over your camera’s sensor. So, when you take a picture, the mirror flips up, and shutter activates to take the shot, after which the mirror flips back down. This might not seem like a big deal, but when it comes to shooting long exposures, this can create some shake to the image. So, if you want to avoid this issue, set your camera, assuming it has this feature, to “M-Up” and then get ready for the two-step process for the shot.

Now, once you line up the shot, you can click the shutter release button which will lift the mirror and then you will need to click the button again to activate the shutter to take the shot. Another option is to enable “Live-View” mode if your camera supports it which will shoot your images with the mirror already lifted. For those with a mirrorless camera such as the Sony A7/A9 series of Fuji can ignore this mistake avoidance step.

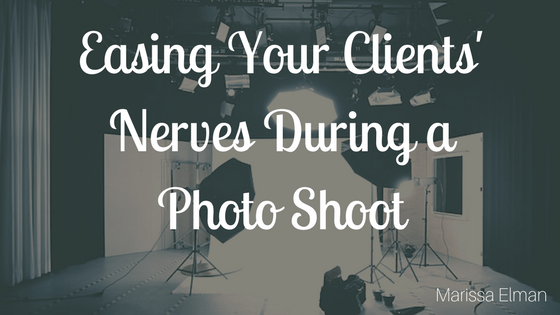
Easing Your Clients’ Nerves During a Photo Shoot

April 26, 2017 by Marissa Elman

Making Your Clients At Ease - Marissa Elman


When clients go to a professional photo shoot, especially for the first time, there is usually a sense of anxiety associated with that for most people. Being the center of focus and putting yourself on display can be difficult for some clients, so as a photographer, it’s important to be ready for their clients to be uncomfortable and to take active steps to ensure their ease. Not only will this help them to appear more natural in the photos, it will also make the entire experience more positive and enjoyable. To make your client’s a feel at ease, follow these tips that professional photographers have been using for years.


Be open from the start


Before the photo shoot even starts, it’s a good idea to take some time to talk to your client about himself or herself. People are normally receptive to questions about their likes and dislikes, and this should help them feel more at ease. This will also give you a better understanding of what their personality is and what they might like to see as an end result from the photo shoot.


Another way to be open with them is to let them know that you’ll be giving them tips and instructions throughout the process. This will make them feel more at ease during the photo shoot when you’re giving them instructions so they don’t feel criticized.


Give Direction


If the client is new to getting their photo taken professionally, chances are they won’t know exactly what to do. Give your clients easy to follow directions that won’t confuse or frustrate them. Let them know some general poses before the shoot starts so they know how to position their body during the shoot.


Give positive feedback


While you’re taking photos if one looks great then tell them about it. This positive feedback will let your client know that they’re doing a good job and will reinforce some of their confidence. Along those same lines, try to downplay any negative emotions that you have with the photos. Instead, actively find ways to improve the photo shoot and continue to give direction.


Be Prepared

Being prepared for a client to be nervous before the shoot is very important but so is having a clear vision for the photo shoot. Have a plan in mind and a direction for the shoot, make sure you’re on time and have everything setup prior to your client arriving. Not only will you look more like a professional, but there will be a lack of general confusion on what the plan is for the shoot.

Navigation

  • Home
  • Blog
  • Contact
  • Health & Fitness
May 2025
M T W T F S S
 1234
567891011
12131415161718
19202122232425
262728293031  
« Oct    

Bookmarks

  • 500px
  • About.me
  • Behance
  • Crunchbase
  • Disqus
  • Tumblr

Copyright © 2025 · Magazine Pro Theme on Genesis Framework · WordPress · Log in